The Main Interface
The GIMP has a strange user interface by comparison. It is a multiple window oriented application that employs context click menus for most operations.
There are two main windows of interest to the user. The Toolbox and the Image Window . There are many other useful windows and dialogs available to the user and as such they are covered in separate chapters.
The Image Window
Oneof the most important windows in The GIMP is the Image Window . This window provides visual access to the image that is currently being manipulated. Any changes to the image are displayed here. Clicking the Image Window with Button2 will allow access to the context image menu that provides tools and functions with which to edit the active image. This menu can also be accessed by clicking the right facing arrow located in the top left of the Image Window.

Figure 2-1 shows the Image Window created by the default settings. When The GIMP is started, there is no available Image Window. A new, blank one can be created by clicking New... from the File menu.
The white area of Figure 2-1 is where new images are created. This white portion is considered blank. It could easily, however, have been any other color or shade. The default image size is 256x256. This refers to the number of pixels across and the number of pixels high that the drawable area is. The scrollbars to the right and below the blank area can be used to access areas of the image that may not be visible because of size or zoom factors. There is a coordinate reading for the mouse cursor located in the bottom left of the Image Window. It displays the location of the cursor whilst it remains within the image area.
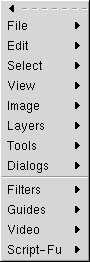
As mentioned earlier, the Image Menu is accessable by context clicking (usually Button2) within the image area or by clicking the right facing arrow in the top left of the Image Window. The menus within The GIMP have a special feature that allows them to be "torn off". Clicking the dotted line at the top of the menu in question will demonstrate this powerful feature.